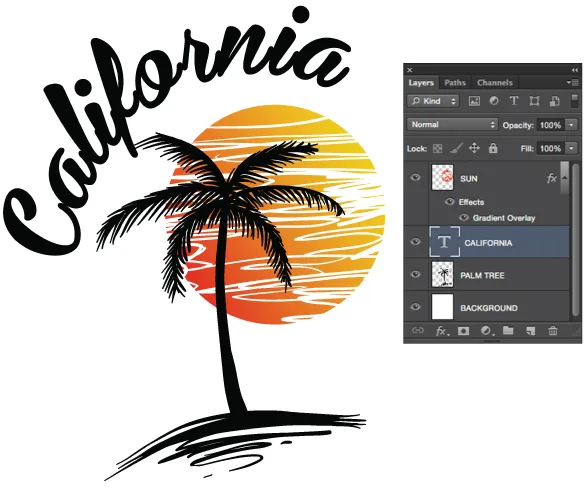
Every good artwork should always follow the standard instructions. Here is the criteria for the artwork submission to ensure quality, creativity, and precision at every step.
Do you want a great personalised T-shirt for you that aligns well with your personality? To fulfill your order we require your support. We ask you for the details and requirements of your desired garment. If you have already decided what you want to print on your shirt then it's already a win situation. But one thing that is important here is the submission of the artwork. You are required to follow certain instructions before submitting the artwork or else it can impact the quality of your apparel. Follow this detailed artwork guideline so you can submit high-quality artwork.
PricesHere is a list of rates that we offer for different services depending on the required quantity.
| Service | Minimum Quantity | Cost / Piece | |
|---|---|---|---|
| Custom T-Shirts | 50 Pieces | £7 | |
| Custom Hats / Caps | 100 Pieces | £4 | |
| Custom Hoodies / Sweatshirts | 50 Pieces | £8 | |
| Custom Uniforms / Medical Scrubs | 100 Pieces | £15 | |
In order to proceed to the design phase, you have to align your formats to the process. In screen printing, you are required to finalise the artwork in vector format because of the inherent limitations. It is crucial for the designs to be vectorised so you can get the high-resolution crisp printing on your shirt otherwise you’ll be left with something pixelated.
The general instructions for the artwork are as follows:
Layering is a crucial step while working on Photoshop. It not only keeps the file organised and maintained but also gives you the flexibility to change or maybe retouch the elements if you make a mistake. It’s not something difficult. On the right-hand side of the layer bar, you will find an icon that resembles a piece of paper. To create a new layer, click the icon. (As the image to the right)
Attention: The file needs to be 300 dpi for it to be a finalised artwork. There you go, you’re left with the finalised version of the artwork that is both organized and designer-friendly. This file is known as a Master File.
NOTE: Never merge or flatten your file.
Do you know what Resolution is? It is the finest detailing of an image which is usually measured in Pixel Per Inch (ppi) or Dots Per Inch (dpi). Understand that what you look at as a picture can be entirely different than what is turned out after printing. The quality of the image printed highly depends on the image resolution. Avoid using low-resolution images because it will only give blurred printing.
To make it easy for you, remember that the more the pixel per inch the greater the resolution. For screen printing, the standardized artwork resolution must be 300 dpi. For the best results, your artwork should be 355 ppi for it to be printing the best quality results.
Note: Low-resolution images are those with resolutions of less than 200. It doesn't give good results.
File Formats (in order of preference)
Adobe Illustrator files that were originally created as vector files and end in .ai
Vector files are saved as EPS and end in .eps Other formats can work but they must be at least 300 dpi with only 2 colors
In the previous instructions, we have already explained the significance of resolution, design, and how low-resolution artwork can ruin your t-shirt. Personalisation isn’t easy as people come up with various different formats that don’t have the capability to yield a good result. There are many hindrances in its way.
Now the question is why is it always have to be in vector format? Well, the answer is its flexibility. When an image is vectorized, it can be molded to any size while still maintaining quality. For instance, if you compare a raster file vs a vector file the results would be shocking. When you zoom in on the raster format, you will find that the images are pixelating.
Not a problem if you have any questions regarding your new project. Discuss with our experts to find the best deals for you!
© 2018 - 2025 Gateway Fashion & Apparel Ltd. All Rights Reserved
Made with by Software Brainiacs

